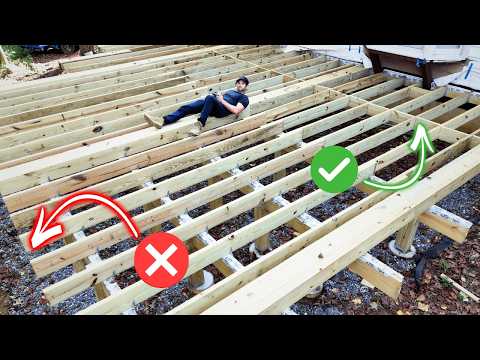
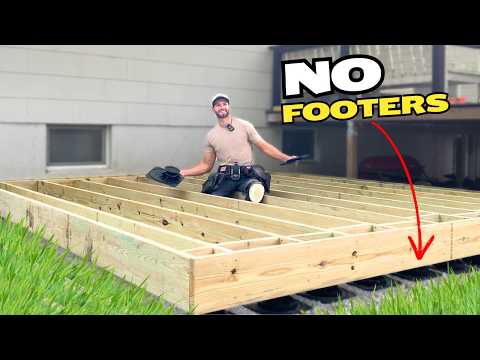
This Deck Framing Method will Help Your Deck Last 20 Years Longer! (DIY Deck Framing Guide)
About
No channel description available.


Video Description
Grab my FREE "How to Build a Deck" Ebook: https://atimprovements.myflodesk.com/freedeckebook If you want to learn how to Frame a Deck the Right Way, You Are in the Right Place! Check Out the NITTO Terra Grappler G3’s: https://bit.ly/4jUSeV1 I have framed 3 decks over the past few years and I think that I have finally figured out the *Best Way* to do it. In this video, I will show you How to Frame a Deck from Start to Finish – focusing on the ledger board, the posts and beams, the joists, and the finishing touches like blocking and waterproofing. To frame a deck, you are likely going to need the following tools and materials (These are all the tools and materials used in the video): Laser Level: https://amzn.to/49K7f9N Ledger Board Waterproofing (similar product): https://amzn.to/47JVKwu 6’ Level: https://amzn.to/47KTsNv Framing Nailer: https://amzn.to/49sydTt 3” Framing Nails: https://amzn.to/3WP3sAq 6” Flashing Tape (similar product): https://amzn.to/3XkB3SW Ledger Flashing (similar): https://www.homedepot.com/p/Amerimax-Home-Products-3-5-in-x-8-ft-Gray-Vinyl-Deck-Ledger-Flashing-Cap-37028/202928692?source=shoppingads&locale=en-US Roofing nailer (not needed, but nice to have): https://amzn.to/43VI9RB Ledgertite Screws: https://www.truevalue.com/product/ledgertite-structural-screw-5-16-x-3-5-8-in/ Joist Tape: https://power-pro.com/products/joist-tape Post Level: https://amzn.to/4hS8x4z Cut and Treat (for sealing cut lumber): https://amzn.to/4hYLeX2 Drill: https://amzn.to/4hNAmeh Thru-Lock bolts (for posts and beam): https://amzn.to/4r7DYfJ Concealed Joist Hangers (size dependent): https://amzn.to/4hPGNxm Joist Hangers (I would get Simpson Brand): https://amzn.to/3JplO8b Hurricane Ties: https://amzn.to/49aRM2u Joist Hardware Nails: https://amzn.to/4oVdiwt Joist Hardware Screws (1.3” & 3”): https://amzn.to/48abtFx 3” Exterior Screws: https://amzn.to/43lYEWT Now that you have your Materials and Tools, we can talk about the four parts of any Deck Framing Project: 1. Installing the Ledger Board: Your ledger board attached to the house and is typically going to be a 2”x8” or 2”x10 in piece of pressure treated lumber. Before attaching the ledger board to the house, apply waterproofing to your home’s rim joist. Next, use a laser level (or 6’ level) to ensure that the ledger board is level, and then nail it to the house with a few 3” framing nails (just to hold it in place). Next, apply flashing to the top of the ledger board. Finally, use structural lag screws to fasten the ledger board to the house. 2. Installing the Posts and Beams: Your deck beam will be supported by either 4”x4” or 6”x6” pressure treated posts. To determine the length of these posts, I recommend using a laser level to project a line that is even with the bottom of the ledger board. Use that line to mark your cuts. After cutting your posts to the correct size, consider notching the posts (as sometimes required by code) depending on what size beam you are installing. With the posts cut to size, install your beam on top of the posts and secure them together using ½” carriage bolts or Thrulock bolts. 3. Installing the Joists: Your deck joists will be the same size as your ledger board and should be pressure treated. I highly recommend that you mark your joist spacing (16” O.C.) before you start installing the joists! Position the joists to that the top is level with the top of the ledger board and secure them in place using joists hangers and the required hardware. Secure the Joists to the Beam using Hurricane ties (or rafter ties). 4. Installing the Blocking and Applying Waterproofing: I highly recommend that you apply waterproofing to your beams (prior to installing the joists) and that you apply joist tape on all of your joists. Since pressure treated lumber only last for around 20 years when unprotected, it could fail 10-15 before your composite decking! As a result, apply waterproofing to give your deck the best chance to last as long as possible. Additionally consider applying blocking between the joists and to support any future breaker boards, railing posts, etc. I genuinely hope this video helps you to tackle your Deck Framing Project with Confidence! If you have any questions, leave me a comment down below and I will be sure to answer. Thanks! Previous deck videos: DECK PLANNING AND LAYOUT: https://youtu.be/UAiCgmjT7Jw?si=4hqhsUwvzynDbrk9 DECK FOOTERS: https://youtu.be/2pu4nQCfYsg?si=C4qjoN5FP1roDQOg Timestamps: 00:00 Introduction 00:23 How to Install the Ledger Board 04:59 Deck Post and Beam Installation 11:07 How to Install Deck Joists 17:10 Blocking, Waterproofing, and Finishing Touches *All content on the Andrew Thron Improvements YouTube channel reflects my own opinions. Please seek out guidance of professionally trained and licensed individuals before making any decisions. Links in the description may be affiliate links.


![Small Bathroom Remodel Time Lapse [Converting a Half Bath to Full Bath]](https://imgz.pc97.com/?width=500&fit=cover&image=https://i.ytimg.com/vi/-MsdKLJrAS8/hqdefault.jpg)
![Hexagon TILE installation [How to TILE bathroom floor with Hexagon Tiles]](https://imgz.pc97.com/?width=500&fit=cover&image=https://i.ytimg.com/vi/wqqx5meNZS0/hqdefault.jpg)
Urgently Needed Deck Framing Supplies
AI-recommended products based on this video
2PC Multi-Functional Vegetable Peeler for Kitchen,Vegetable Peeler Wooden Handle,2-in-1 Stainless Steel Fruit & Vegetable Peelers with Bottle Opener for Potato Pineapple

Aquoxis Pressure Washer, Aquoxis Pressure Washer Gun, Durable Stainless Steel, 360° Rotating for Three Spray Modes, Fast & Portable, and Time-Efficient, Universal Compatibility (1PCS+Foaming Pitcher)

Ultra-Slim Bidet Attachment, Posterior&Feminine Wash-(Retractable Dual Nozzles), Non-Electric Bidet Attachment for Toilet Seat, Adjustable Fresh Cold Water Pressure, Stainless Steel Inlet (White)